assembly guide
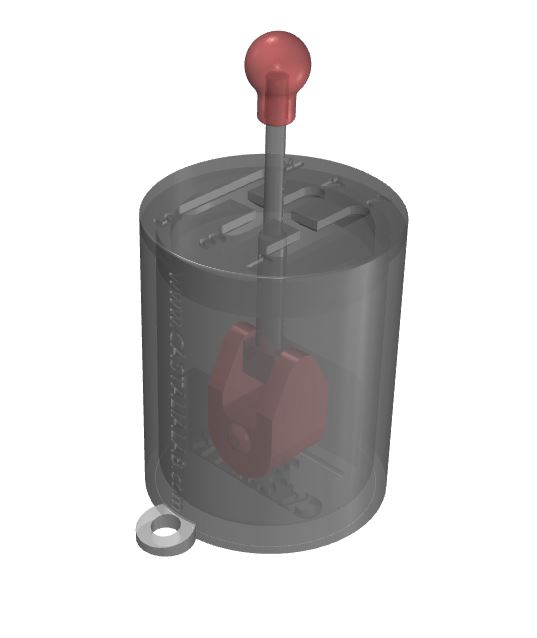
gearshift keychain 3d model
This page is made by our company to give you all the informations about our models and to supply you with advices on how to implement your prints correctly - hoping to solve your doubts!
which material should i choose?
You will always hear that choosing the right material for your prints is one of the most important thing to do to achieve a good result, especially when your creation needs to respond to a special requirement (flexibility, resistance, printability, etc)... but, believe us, this is not the case :)
The geometries of this file are so simple, that they are not hit by printing problems and can be easily printed with any type of material, exception made for flexible materials, which however could be used to print the knob.
our recommended materials
With this 3D model we have had excellent printing results using PLA, but you can also try to print it with other types of materials. Here below you can find our selection of the best filaments available for each kind of material that may be used to print this model efficiently:
- PLA: SUNLU
- ABS: SUNLU
- PETG: AMAZONBASIC
- HIPS: GIZMO
- Z-ULTRAT: ZORTRAX
HOW TO PRINT?
CORRECT ORIENTATION and supports
On the right you can see a screenshot from Z-Suite, the slicer of the Zortrax printers. This is the one that we use but you can use yours, just make sure of having placed the components correctly on the bed during the settings: follow the disposition of the image on the right and you shouldn't have any problem.
Be careful because even if the print is simple, some support structures are required to achieve the best result. You can take a look at the picture to have an idea of where there should be placed.
tHE PRINTERS WE USE
Over the years we have tested several printers, and we have prepared for you a selection of the best ones you can easily find and purchase on internet. We have chosen some models which use the FDM (Fused deposition modeling) technology and some others that are using UV and LCD technologies. As Amazon Associates we earn a commission from qualified purchases, so our aim is to provide you with the best solutions. Take a look at the list below:
FDM printers
RESIN printers

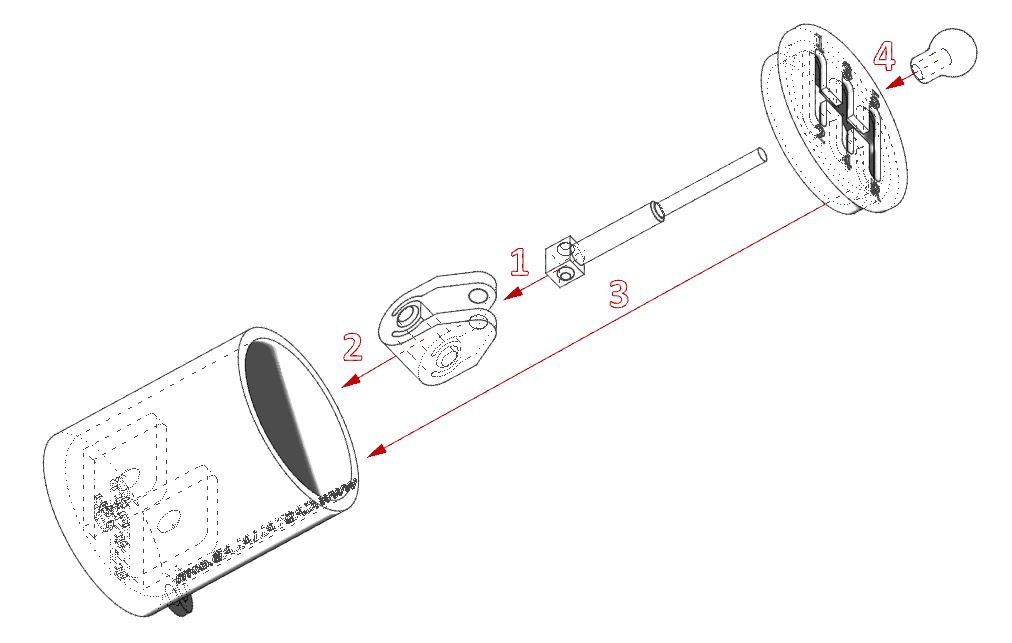
how to assembly?
LET'S TRY
When the printing process will be finished, gently remove the prints from the bed removing the supports as well, being careful not to break the prints in the process. Remove the raft from the print if it is present, notice that all the parts could be printed even without it.
Then put all the five pieces together following the scheme on the right. All the parts will clip automatically when in place, no glue needed for the joints, but only for the knob.
WE SUGGEST YOU
To achieve always the best results, and to avoid problems such as the breaking or the damage of the prints we are used to a series of indispensable tools, check it out:
- To remove support structures and maintain the printer: Best 3D printing Kit
- To smooth your prints: Smooth On XTC
- Glue for 3D printed parts: Loctite Gel
© Copyright tecnoforniture